In any case, I thought this was a good idea, because there are a lot of misperceptions about how these things work and how the frame is actually built. I do NOT build the frame and then cut it in half, folks!
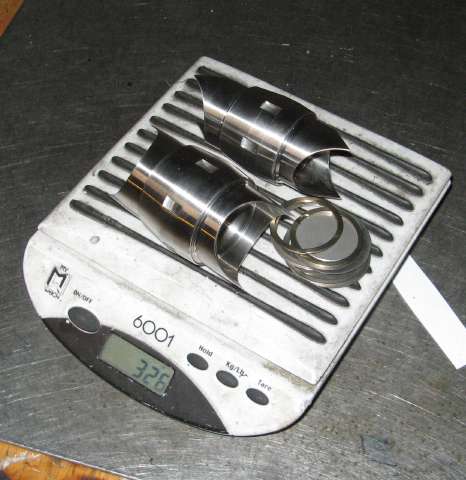
First, here's a picture of the hardware - as you can see, it's not light. The couplers (this is a set of pretty big ones for a large mountain bike) weigh in the neighborhood of 2/3 of a pound, though you also use about 1 ounce less frame tubing when building with them. So they aren't particularly a weight weenie accessory.
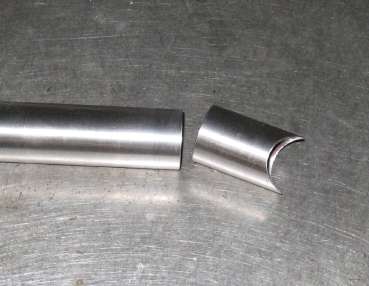
The first step is to figure out where the couplers need to go. This is surprisingly easy with anything but a truly tremendous bike - the couplers can go most anywhere on the top and down tubes near the seat tube, and the bike will fit into its case just fine. The trick is making sure that the coupler is in the butt (thick portion) of the tube - they aren't meant to be installed on the thinner center section. Once I figure all that out, I miter the rear/seat tube joint portion of the tube (the coupler itself won't clamp well into my mitering fixture, so it's necessary to miter before installing) and cut where I want the coupler. In many cases, I remove a significant portion of the butted section, because the coupler adds quite a bit of length to the tube (about 1 inch) and I need to make sure that I have enough butt at the head tube end.
Next, I clamp the tube in the workstand, cover it with flux, and install the coupler. Here's a picture of the fluxed-up setup. For this end, I don't have to be careful about the orientation of the coupler, because the tube has yet to be mitered.

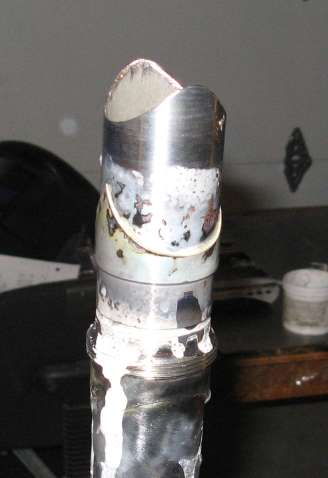
Next, I braze the coupler in using 56% silver. This isn't the easiest operation, because the coupler is stainless steel, and it has some nasty thin bits that are easy to overheat and cook the flux (meaning that the silver won't flow where it needs to, and the joint won't be a strong as it should). I've done a lot of them, though, so it's not too stressful. This is the same process that is used when building a lugged bike. Here's a picture of the brazed joint.

Next, I braze the other side of the coupler to the short cut-off section of the tube. This time, I have to make sure the points of the lug on the coupler line up with the sides of the tube - I don't like putting points on the top or bottom of the tubes, because I'm a little uncomfortable with the points in the same plane as a lot of the major stresses that the frame will undergo.
Here's a picture of both parts of the coupler brazed into the tube.
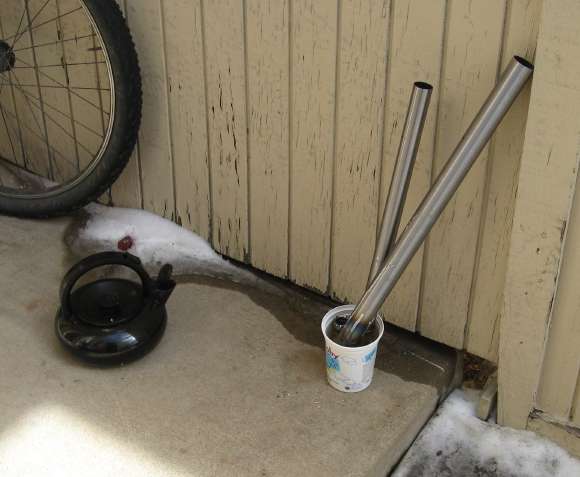
Next, I have to get the flux off (it attracts moisture and will end up leading to a rusty tube if it's not cleaned off), so I soak the couplers and tubes in boiling water for 10 minutes or so. I'm not allowed to do this in the house, and I've kicked over the can enough times now that I won't do it in the shop either, so it gets done outside the garage. Yogurt containers are what the pros use, guys.
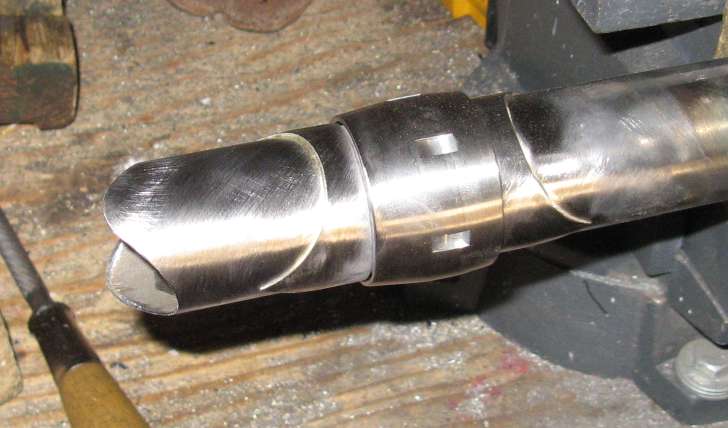
Finally, I clean off the remnants of the flux with a stainless steel brush. Note that I've done a little bit of polishing of the couplers here so that you can see what's going on, but I won't do a final polishing run on them until the frame is ready to take to the powdercoater. The couplers are stainless, so I like to have them masked so that the polished stainless shows up against the powdercoated tube with a nice defined point. Looks neato, and there's no corrosion concern. Of course, on a mountain bike, the coupler is generally just going to be covered up by a rubber sleeve anyway, but whatever.
Here's the final product, ready to be mitered up and welded into the frame. From here, it's pretty straightforward in terms of frame construction, so the photos and explanations will stop there. I will eventually do an exhaustive "how I build a frame" post or two, but it's not going to be today.
Finally, here are some general thoughts about S&S coupler bikes.
-You will not notice them when riding (unless you can notice the weight, I guess). The couplers are just as stiff as the tube section they replace, and if properly tightened, are undetectable in the ride of the bike.
-They're not cheap. The couplers are $350, and a good hard case is another $300 (I do not recommend the "designer" case that S&S sells). So you'll be $650 in the hole right off the bat. You'll save $50-75 each time you fly, though (usually each way) so you can make that money back in 3 or 4 trips.
-They are a pain to pack. You need practice in packing them, and even with some experience, it will take between 20 minutes (for a road bike) and 45 minutes (for a large 29" mountain bike) to pack the bike. Figure half that time to unpack and reassemble. So they aren't good for extremely short trips - you'll spend more time packing and unpacking than riding if you're just going for a day or two. Sarah and I use ours only for trips that are at least 3 or 4 days long. For shorter trips, we'll just rent bikes or go running instead.
-If not packed *perfectly* they'll get dinged up on the plane because the parts shift around inside. You can pack with lots of foam tubes on the frame and put all your small parts in a clear river-running drybag to keep this from happening, but it will add to the packing and unpacking time. Keep in mind that TSA will often open/rummage through the case, and that they may not be as careful as you are when closing it back up. If scratches or chipped paint upset you, this could be a bad thing.
-Extremely large mountain bikes (over 26" toptube) often will not fit in the 10" (airline kosher) case. I have seldom had my case measured, but if it does happen, you could end up paying the regular bike fee.
-The case+complete large mountain bike weighs about 45 pounds. In most cases, the weight limit for a single item of luggage is 50 pounds, so there's no way to pack lots of other stuff in with the bike without going over.
In summary, S&S couplers rule if you like to travel with your bike, and you have the patience to learn to pack it correctly.
3 comments:
super cool!
I dig it
not sure if I can afford it
but I dig it
Are you able to add these the a already built frame? Ie. A Surly Krampus?
Sure, it'll run ya $750.
-Walt
Post a Comment